

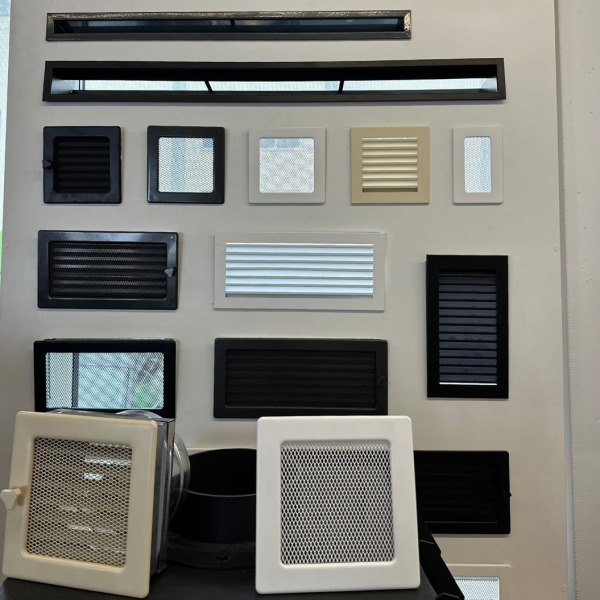
Ventilation grilles are not a decorative element of a fireplace, but a critically important part of the entire fireplace heating system. They ensure proper air convection, stable operation of the fireplace insert or cassette, high efficiency, and a safe temperature regime for the cladding and ceiling.
In practice, it is precisely the installation of fireplace ventilation grilles that is most often carried out with mistakes. As a result, owners face overheating of the structure, poor heat output, cracks in the casing, ceiling overheating, or even failure of the fireplace insert.
In this article, we will take a detailed look at:
- typical mistakes when installing grilles;
- correct principles for calculating their quantity and area;
- requirements for orientation and placement;
- practical recommendations from the manufacturer SAVEN;
- real-life examples and solutions that help avoid problems.
Why ventilation grilles are crucial for fireplace operation
Any fireplace insert or cassette operates on the principle of natural convection:
- Cold air from the room enters the lower part of the convection chamber.
- Inside the casing, it is heated by the body of the fireplace insert.
- Heated air exits into the room through the upper ventilation grilles.
If this process is disrupted, the fireplace loses efficiency, and the temperature inside the casing begins to rise uncontrollably.
The most common mistakes when installing ventilation grilles
Fireplace ventilation grilles are not an “option” but a mandatory component that:
- ensures stable convection;
- increases fireplace efficiency;
- protects the cladding and ceiling from overheating;
- extends the service life of the insert.
Mistake No. 1. Incorrect calculation of the number of ventilation grilles
One of the most typical situations is installation “by eye” or according to the principle “this is how it’s always been done.”
In reality, the number and area of ventilation grilles directly depend on the power of the fireplace insert or cassette.
Correct calculation for SAVEN fireplaces
Inlet ventilation grilles:
Installed in the lower part of the convection chamber, beneath the insert.
Calculation formula:
50 cm² of open area for each 1 kW of nominal fireplace power
For example:
- fireplace insert 10 kW
- minimum inlet grille area = 500 cm²
Outlet ventilation grilles:
Located in the upper part of the convection chamber.
Calculation formula:
75 cm² of open area for each 1 kW of power
For the same 10 kW insert:
- minimum outlet grille area = 750 cm²
Mistake: when the inlet or outlet grille area is smaller than recommended, overheating of the casing and reduced heat output occur.
Mistake No. 2. Confusion between overall and installation dimensions
One of the most critical and least noticeable mistakes.
Installers often calculate ventilation area based on the overall dimensions of the grille, without taking into account:
- frame thickness;
- internal opening;
- the actual “free” airflow area.
Example:
A grille has an overall size of 170 × 170 mm:
- overall area: 289 cm²
- actual opening area: 152 × 152 mm
- free airflow area: 231.04 cm²
If this is not taken into account, actual ventilation will be 20–30% lower than calculated.
Solution:
- always check the installation (mounting) dimensions;
- use SAVEN technical documentation;
- calculate ventilation area only based on free airflow area.
Mistake No. 3. Incorrect orientation of ventilation grilles
Even a properly selected grille will not work efficiently if it is incorrectly oriented.
Basic convection rule:
- cold air enters from bottom to top;
- hot air exits from top to bottom.
Correct grille orientation:
Below the fireplace insert
→ internal opening and louvers are directed upwards
Above the fireplace insert
→ internal opening and louvers are directed downwards
This rule applies to:
- grilles with fixed louvers;
- straight and corner models;
- decorative ventilation grilles.
Incorrect orientation causes hot air to become “trapped” inside the casing.
Mistake No. 4. Lack of ventilation for the decompression chamber
The temperature in the upper cladding zone is the highest. This is where most often:
- drywall cracks;
- metal elements deform;
- the ceiling overheats.
Mandatory solution from SAVEN
At a height of approximately 400 mm from the ceiling, it is necessary to:
- install an additional ventilation grille;
- ensure cooling of the decompression chamber.
This:
- reduces peak temperatures;
- protects the ceiling;
- extends the service life of the structure.
Mistake No. 5. Incorrect placement of grilles in the room
Another common problem is installing grilles:
- too close to doors;
- in “dead” zones;
- without considering airflow direction.
Correct approach:
- warm air flow should be directed toward the center of the room;
- grilles should be installed as far from doors as possible;
- draft zones should be avoided.
This ensures:
- even heating;
- comfortable air circulation;
- no local cold zones.
Mistake No. 6. Lack of sealing during installation
Even a perfectly selected grille will not work properly if:
- gaps remain between it and the casing;
- air is drawn not from the room, but from the structure.
Correct solution:
- all gaps must be sealed with a special heat-resistant sealant;
- the grille must be rigidly fixed in the mounting opening.
Features of installing SAVEN ventilation grilles
SAVEN ventilation grilles are specifically designed for fireplace systems and take into account:
- high operating temperatures;
- convection requirements;
- ease of installation and adjustment.
Types of SAVEN grilles and installation requirements
Grilles with mesh (SAVEN CLASSIC series)
- provide free airflow;
- require correct positioning;
- must not be blocked by decorative elements.
Grilles with adjustable louvers (SAVEN CLASSIC series with louvers)
- must be installed with free access for adjustment;
- allow control of airflow intensity.
Grilles with fixed louvers (SAVEN HIDE series)
- correct orientation is critically important;
- louver direction corresponds to airflow direction.
Straight and corner grilles (series SAVEN LOFT and LOFT ANGLE)
- straight — for flat surfaces;
- corner — for installation on cladding corners;
- the internal opening is always oriented according to the installation zone (up or down).
Checklist for correct installation of fireplace ventilation grilles:
- Correct inlet and outlet grille area calculated
- Free airflow area considered, not overall dimensions
- Correct orientation ensured
- Ventilation of the decompression chamber provided
- Airflow directed toward the center of the room
- Grilles positioned away from doors
- All gaps sealed
Conclusion
Installation of fireplace ventilation grilles is a technically important stage that directly affects:
- heating efficiency;
- structural safety;
- durability of the fireplace insert.
Most problems arise not because of the fireplace itself, but due to mistakes made during grille installation. Following SAVEN manufacturer recommendations allows you to avoid these risks and ensure stable, safe, and efficient fireplace operation for many years.